Search Light v1.1 Instructions
Installation Instructions
Dependencies
This gimmick depends on the following packages. Make sure you have installed them before you install this gimmick.
- Modular Avatar (1.9.13 or above): https://modular-avatar.nadena.dev/
- lilToon (1.7.3 or above): https://lilxyzw.github.io/lilToon/#/
Importing Unity Package
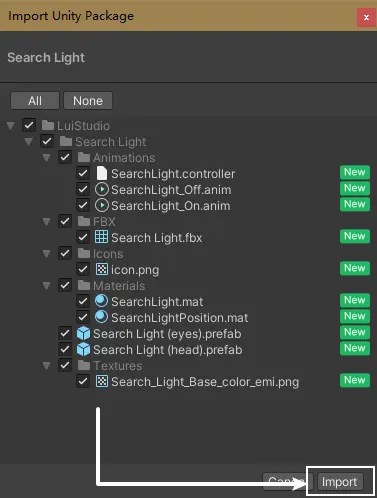
Drag Search Light.unitypackage into Project window, click the Import button on the dialog to import the package to your avatar project:
Installing Search Light
1. Add Prefab to Scene
Due to the limitation of Modular Avatar, a exception would be thrown if the target is empty in MA Bone Proxy component. Though most of avatars contain eye bones, i remained prefab with target asigning head bone instead of eye bones to prevent error.
Check your avatar to make sure if it contains eye bones to add the currect prefab as below:
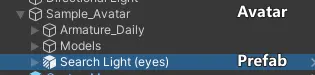
- Contains eye bones:
Search Light (eyes).prefab - No eye bones, or yes eye bones but you do not want the light to follow the gaze:
Search Light (head).prefab
Drag the satisfied prefab from Assets/LuiStudio/Search Light to your avatar. Hierarchy should be like:
2. Reposition
There's a position indicator model for better experience, the model will be automatically removed after build / upload.
1. Roughly Move Search Lights
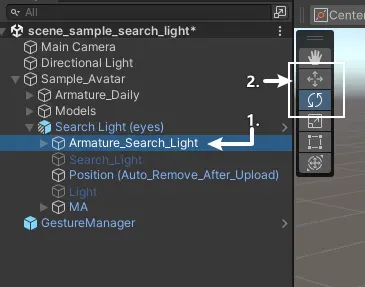
Select Armature_Search_Light[1] under the added prefab, use the Move Tool and Rotate Tool[2] and move the Search Light in front of avatar's eyes:
It should look like this after the movement:
2. Adjust Search Lights for Both Eyes
We need to align the search lights to both eyes after the roughly move. In this instructions, we'll adjust the search light for left eye, then we make the search light for right eye symmetrical based on the coordinates of the left eye.
1. Adjust for a Single Eye (Left Eye Example)
In the Hierarchy, select Search_Light_L under Armature_Search_Light[1], and use Unity's Move and Rotate[2] tools to align the light beam to the front of the left eye[3]:
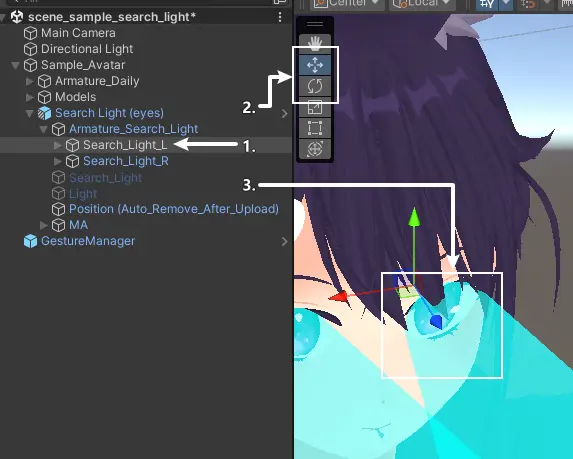
After adjustment, the light beam for the other eye will automatically mirror the position of the adjusted eye.
2. Cancel Symmetry (Optional)
In the Hierarchy, select the prefab, go to the Inspector, find and remove the Search Light Symmetry Tool component.
3. Remove Position Indicator Model (Optional)
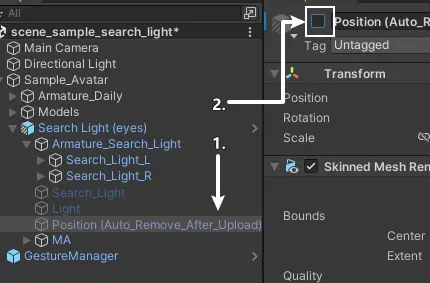
In older versions of VRCSDK, the position indicator model (the blue light pillar) may not be automatically removed. In this case, you need to remove it manually.
Select Position (Auto_Remove_After_Upload) and uncheck the active box in the Inspector:
Well Done
You have done the installation, head to How to Use and try it in VRChat.
Installing endHow to Use
You've done the installation, it's time to try it out in VRChat.
- Turn on the action menu, locate the Search Light switch, turn it on/off to show/hide the search light.
Miscellaneous
Set the Size and Length for Light Pillar
There are 2 bones for each search light, which can set the size and length for the light pillar if we adjust their scale and position.
Change the Switch Position in Action Menu
The switch is installed to the root menu by default, that's not friendly to avatars having many other gimmicks. You can change the position of the switch using Modular Avatar:
- Select
Menu/Search Lightunder the prefab in Hierarchy. - Head to the Inspector, click on the
Select Menuinside theMA Menu Installercomponent. - Select the submenu where you want to put in.
What if the light beams for both eyes are not automatically symmetrical?
If the beams are not symmetrical, or if the symmetry component reports an error, you need to manually mirror the light beams. Assuming you have already adjusted the beam for the left eye, follow these steps to make the right eye beam symmetrical to the left eye:
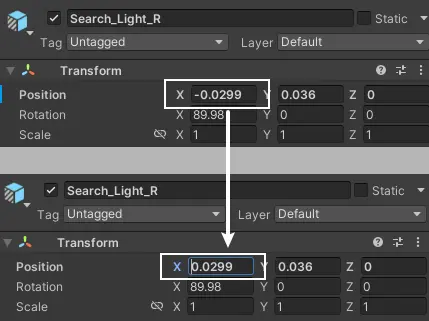
Select Search_Light_L[1], head to Inspector, right click on Position under Transform, and click on Copy[2]:

Select Search_Light_R[1], head to Inspector, right click on Position under Transform, and click on Paste[2]:
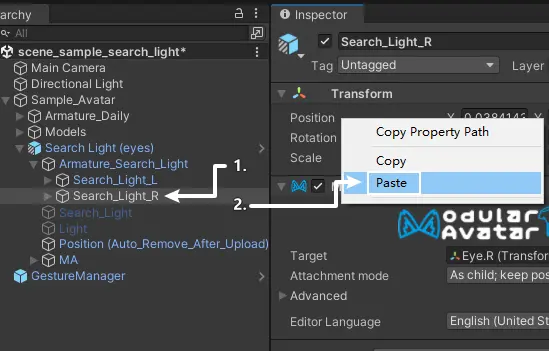
Make the X axis value opposite in Position: